Why Your Salon Blowout Dies in 48 Hours (And How to Make It Last All Week)
You leave the salon feeling untouchable. Your hair is smooth, shiny, and moves like it belongs in a L'Oréal ad. Then Tuesday rolls around and you're back to the same frizzy situation you walked in with on Saturday. Sound familiar?
This isn't a you problem — well, not entirely. There's a real reason professional blowouts deteriorate faster than they should, and most of it comes down to things that happen after you leave the chair. Understanding the mechanics behind the fade is the first step to actually doing something about it.
The Real Reason Your Blowout Doesn't Survive the Week
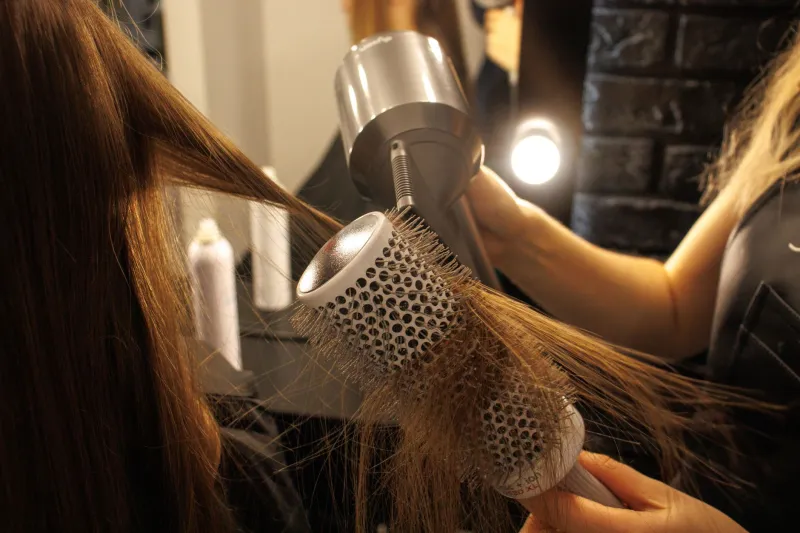
Here's the thing about a salon blowout: it's essentially a temporary restructuring of your hair's hydrogen bonds. Heat and tension — the blow-dryer plus the round brush — work together to reshape the hair shaft into a smoother, straighter, or fuller form. But hydrogen bonds are moisture-sensitive. The second your hair encounters humidity (hello, every bathroom shower ever), those bonds start reverting back to their natural state.
Your stylist knows this. What they don't always explain is that the products they use create a kind of protective film that slows down that reversion process. The problem? Most of us either skip those products at home, use the wrong ones, or apply them in the wrong order — completely undermining the heat work we just did.
There's also the tool factor. Salon blow-dryers are typically 1800 to 2000 watts, with concentrated airflow that sets the hair faster and more evenly. Most at-home dryers hover around 1200 to 1500 watts, which means longer drying time, more moisture exposure, and less precise tension control. It's not just about skill — the equipment genuinely makes a difference.
Product Order Is Everything
If you're applying your heat protectant, smoothing serum, and finishing spray in a random order, you're leaving a lot on the table. Professionals follow a deliberate layering logic, and it's worth stealing.
Step 1: Start with a lightweight leave-in or blowout primer on damp hair. This is your base coat — it lightly coats the strand, reduces friction during drying, and preps the hair to hold its shape under heat. Look for ingredients like hydrolyzed silk or panthenol. Apply from mid-length to ends, not the roots.
Step 2: Add your heat protectant on top. Yes, separately. A lot of people use a 2-in-1 and call it a day, but dedicated heat protectants — especially ones with silicones or polymers — create a more effective thermal barrier. Apply this all over, including the roots if you're going for volume.
Step 3: Rough-dry first. Get your hair to about 80% dry using your hands or a paddle brush before you even pick up a round brush. This removes the bulk of the moisture and means you're using the round brush for shaping, not just drying. Less time under heat, more controlled tension — that's the combo that actually sets the style.
Step 4: Section and dry in the direction of the cuticle. Always aim the nozzle downward along the hair shaft. This flattens the cuticle rather than roughing it up, which is what gives that mirror-like shine you get at the salon.
Step 5: Finish with a cool shot. This is the step most people skip, and it's genuinely important. The cool air sets the hydrogen bonds in their new position. Think of it like putting a dish in the freezer to set faster — same principle. Hold each section taut while you blast it with cool air for at least 10 seconds.
Step 6: Seal with a light finishing product. A small amount of a silicone-based serum or a light flexible-hold spray locks everything in and adds that extra layer of humidity resistance. Less is more here — you want to add shine and protection without weighing the style down.
Heat Settings That Actually Matter
Hotter isn't always better, and it's definitely not always smarter. Fine or color-treated hair can handle somewhere between 300°F and 350°F — anything higher risks protein damage that'll undo all your hard work over time. Thicker or coarser hair can go up to 400°F for the initial drying phase, but you should still drop the temp when you're doing detail work near the roots or face-framing sections.
If your dryer has a concentrator nozzle, use it. It directs airflow precisely and keeps heat from scattering across sections you're not actively working on. This speeds up the process and gives you more control — both of which add up to a longer-lasting result.
The Overnight Strategy
One of the biggest killers of a fresh blowout? Sleep. Tossing and turning creates friction, and friction disturbs the cuticle alignment you worked so hard to achieve.
A silk or satin pillowcase is a non-negotiable investment if you want to extend your blowout. The low-friction surface lets your hair slide rather than snag. Beyond the pillowcase, loosely wrapping your hair in a silk scarf or doing a soft, low ponytail at the crown before bed can preserve the shape significantly. Some people swear by the "pineapple" method for curly or wavy blowouts — gathering hair at the very top of the head in a loose scrunchie so the ends don't get flattened.
The Dry Shampoo Timing Trick
Most people reach for dry shampoo when their hair already looks oily. Flip that habit. Apply a light layer of dry shampoo at the roots the night of your blowout, before any oil has a chance to build up. It absorbs preemptively and adds grip that actually helps your style hold its shape longer.
When you do need to refresh mid-week, a quick blast of warm air (not hot) after applying dry shampoo will reactivate the products already in your hair and smooth out any slept-in texture without requiring a full redo.
The Bottom Line
Your salon blowout isn't doomed to a 48-hour lifespan. The fade is mostly a product of missing steps, mismatched tools, and a few fixable habits. Nail the layering order, respect the cool shot, protect your hair while you sleep, and work smarter with dry shampoo — and that Sunday salon feeling can realistically carry you to Thursday or Friday without a full wash-and-redo.
Your hair did the work. Now give it a fighting chance to hold on.